A ripped duvet cover seam can turn a comfortable bed into a trail of loose threads, exposed filling, and restless nights. The question is practical: How to fix a ripped duvet cover seam? The answer depends on the tear’s length, fabric weight, and seam construction. A small split near the edge may need only a sharp needle, matching thread, and careful backstitches. A larger opening requires reinforcement, accurate alignment, and patience.
Repairing bedding also supports a wider sustainability goal. The U.S. Environmental Protection Agency reports that Americans generated about 17 million tons of textiles in 2018, while approximately 11.3 million tons reached landfills. These figures cover all textiles, not duvet covers specifically, but they show why extending product life matters. WRAP’s Valuing Our Clothes report found that extending clothing use by nine months could reduce carbon, water, and waste footprints by roughly 20–30%. Bedding is different. Still, the principle is relevant.
Good repairs begin with inspection, not rushing. Turn the cover inside out and examine whether the original seam allowance remains intact. Remove only damaged threads. Keep the fabric flat. Choose polyester thread for everyday durability, and use a fine needle for tightly woven cotton. I have found that hurried stitching often creates puckering, especially around corners. That mistake is easy to make.
This 2026 guide explains suitable stitches, reinforcement methods, washing considerations, and when replacement becomes more sensible. It also acknowledges an uncomfortable truth: a neat repair may not restore the cover perfectly. It can, however, keep useful fabric in service longer.
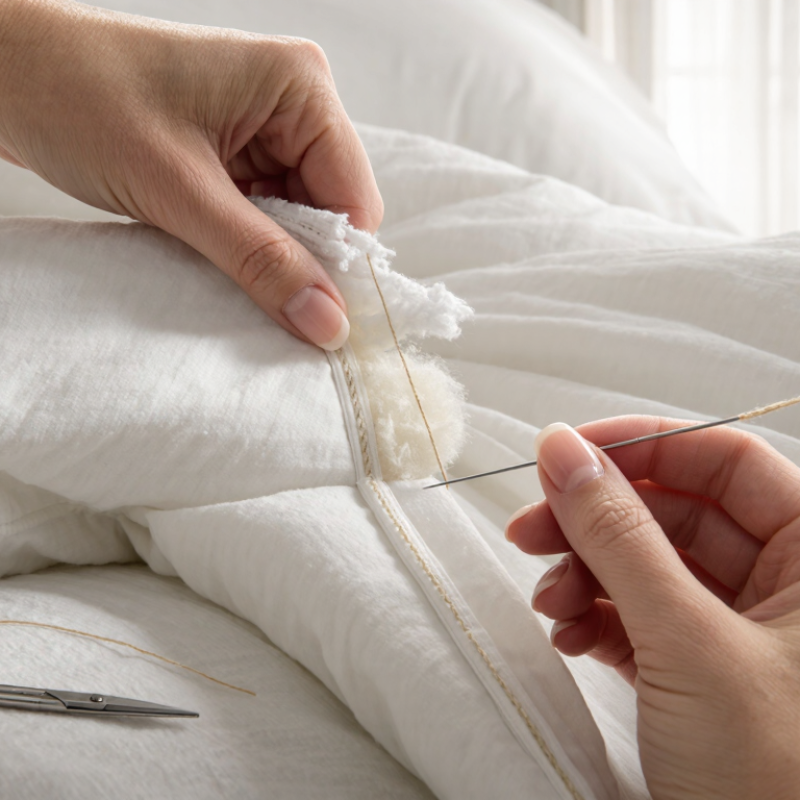
Assess the Damage and Identify the Torn Seam
Before reaching for a needle, place the duvet cover on a clean, flat surface. Spread it fully, then inspect the tear under bright, direct light. A seam failure usually shows separated stitches, while the surrounding fabric remains intact. A fabric rip looks different. Its threads may run outward from the damaged area. Check both sides, because a small opening can hide beneath a folded edge. Run your fingertips lightly over the area. Stop if the fabric feels weak.
Measure the opening from end to end, including loose sections that may unravel. Record the width, location, and seam type, such as a side seam or corner join. Photograph the damage before moving the cover. This creates a useful reference if the tear grows during handling. Look for missing stitches, broken thread, stretched fabric, stains, or pulled-out fibers. If the duvet insert is visible, keep it supported to prevent extra strain. Do not tug the cover to test it. I once made a small split worse by pulling too firmly.
Separate loose threads from the actual tear with blunt scissors, but leave secure stitching untouched. If only the thread has failed, the repair may be straightforward. If the fabric edge is frayed, thin, or torn beyond the stitch line, stronger reinforcement may be needed. A corner tear deserves special attention because filling pushes against it repeatedly. Mark the damaged area with removable chalk, not permanent ink. Clean hands matter. Avoid washing the cover until its condition is documented and the opening is protected.
How to Fix a Ripped Duvet Cover Seam in 2026? — Assess the Damage and Identify the Torn Seam
How to use this chart: Inspect the damaged area, measure the opening, and match the condition to the suggested repair. Small loose stitches usually need restitching, while a larger fabric tear may require reinforcement or a patch before sewing.
Prepare the Duvet Cover for Safe, Even Repair
Before repairing a ripped duvet cover seam, remove the duvet insert completely. Lay the cover flat on a clean, well-lit table. A floor can work, but it often adds dust and awkward pressure. Check the tear from both sides. Look for loose threads, stretched fabric, or nearby weak stitches. Do not pull the opening wider.
Wash and dry the cover according to its care instructions. This removes oils that can affect handling and reveals the fabric’s normal shape. Let it cool fully before repair. Turn the cover inside out, then place the damaged seam facing upward. Match the original edges carefully. The printed pattern may help, but fabric grain is more reliable. Use small pins or clips, keeping them away from your fingers. Choose a thread that suits the fabric’s weight, not only its color.
Trim only loose threads. Leave firm stitches untouched. A short backstitch usually gives a stronger result than long, loose stitches. Keep the tension even, because tight thread can pucker the seam. Test two or three stitches on an hidden area first. I once rushed this step and created a visible ridge. It was fixable, but avoidable. For slippery satin or very thin fabric, slower hand stitching may be safer than forcing a machine through the seam. Stop if the fabric begins fraying rapidly. The cover may need professional textile repair instead.
Sew the Ripped Seam Step by Step
How to Fix a Ripped Duvet Cover Seam in 2026?
A ripped duvet cover seam is usually repairable with basic sewing tools. I recommend removing the cover and placing it on a clean, flat surface. Trim loose threads carefully, but do not cut the fabric. Turn the cover inside out. Align the torn edges, matching the original seam line. Use small backstitches with a strong polyester thread. Keep each stitch close and even. A needle with a sharp, medium point works well for tightly woven fabric.
Sew beyond both ends of the tear by about two centimeters. This extra stitching prevents the rip from reopening. Knot the thread securely, then hide the knot inside the seam allowance. Turn the cover right side out and inspect the repair under bright light. My first repair was slightly uneven, but it held after washing. That taught me to slow down near the corners. If the fabric feels thin, add a narrow strip of matching fabric behind the seam. It improves support without adding much bulk.
Tips: Wash and dry the cover before repairing it, unless the care label advises otherwise. Pre-shrunk fabric gives a more accurate fit. Test your thread on an inside corner first. Avoid pulling the stitches too tightly. The fabric should lie flat. After sewing, wash on a gentle cycle and check the seam again. A small repair is easier to manage before the opening becomes wider.
Reinforce the Repair and Check the Finished Seam
After repairing a ripped duvet cover seam, reinforce it before removing the fabric from your work area. Turn the cover inside out and align the edges carefully. I use matching polyester thread and a fine needle for most cotton or blended fabrics. Remove loose threads, but avoid cutting into sound stitches. Keep the fabric flat.
Sew beyond both ends of the tear by at least two centimeters. Use small, even backstitches for strength. At each end, make three extra stitches. Add a second line beside the original seam if the fabric feels weak. A narrow strip of lightweight cotton fabric can support a badly stretched section from the inside. I once made the backing too wide, and it caused a stiff ridge after washing. Trim support fabric neatly, but leave enough coverage.
Check the finished seam in daylight. Hold the cover up and gently pull both sides apart. The stitches should stay level without puckering or visible gaps. Run a fingertip along the inside seam. Watch for sharp thread ends. Test the zipper or buttons several times, because a repaired edge may shift during use. Wash the cover on a gentle cycle, then inspect it while damp. If the seam opens again, the surrounding fabric may be worn, not merely torn.
How to Fix a Ripped Duvet Cover Seam in 2026? - Reinforce the Repair and Check the Finished Seam
| Repair Stage |
Recommended Action |
Materials or Tools |
Typical Time |
Quality Check |
| 1. Inspect the Damage |
Turn the cover inside out and identify the full length of the opened seam. Check whether the fabric is frayed, stretched, or torn beyond the original stitching line. |
Bright light, ruler, fabric marker, small scissors |
5–10 min |
Damage is mapped at least 1 cm beyond visible loose threads |
| 2. Prepare the Edges |
Trim only loose threads and align the two fabric edges without pulling them. Press the seam flat if creases prevent accurate alignment. |
Sharp thread snips, iron, pressing cloth |
5–8 min |
Edges meet evenly and are not puckered |
| 3. Choose the Stitch |
Use a short, straight machine stitch for a clean, durable repair. For hand sewing, use small backstitches and keep stitch spacing consistent. |
Sewing machine or hand-sewing needle, matching thread |
2–5 min |
Stitches are even and secure without excessive tension |
| 4. Sew the Main Repair |
Sew approximately 6 mm from the fabric edge, crossing slightly into the strong fabric on both sides of the rip. Backstitch or lock the thread at both ends. |
All-purpose polyester thread, needle or machine |
5–15 min |
No gap remains when the seam is gently opened |
| 5. Reinforce the Seam |
Add a second line of stitching parallel to the first, or sew a narrow zigzag over a frayed section. For a large tear, place a lightweight fabric patch on the inside before stitching. |
Matching thread, lightweight cotton patch, sewing machine or needle |
8–20 min |
Reinforcement extends beyond the damaged area by about 1–2 cm |
| 6. Secure and Trim Threads |
Tie off hand stitches or lock machine stitching, then trim thread ends close to the seam without cutting the fabric. |
Thread snips or small scissors |
2–5 min |
No loose thread can catch on bedding or zippers |
| 7. Check the Finished Seam |
Turn the cover right side out and inspect both sides. Gently pull the seam in several directions to test whether the stitches hold and the fabric remains flat. |
Hands, bright light, ruler |
5–10 min |
Seam stays closed with no visible stress points |
| 8. Wash-Test Preparation |
If the repair passes inspection, wash according to the care label. Avoid high heat until the repair has survived one gentle wash and air-drying cycle. |
Care label, laundry bag if needed |
Varies |
No opening, skipped stitches, or new fraying after washing |
Finished-seam standard: The repaired seam should lie flat, remain closed under gentle tension, contain secured thread ends, and show no fresh fraying or skipped stitches.
Conclusion
Repairing a torn duvet cover seam is a simple, practical task when handled carefully. The process begins by assessing the damage and locating the full length of the ripped seam, checking whether the surrounding fabric is weakened or frayed. Next, gather a needle, matching thread, scissors, pins, and a flat, well-lit work surface. Wash and dry the cover if necessary, then turn it inside out and smooth the fabric so the edges align evenly. Asking “How to fix a ripped duvet cover seam?” leads to a straightforward solution: use small, consistent stitches to close the opening, following the original seam line and avoiding excessive tension.
After sewing, secure the thread with several firm knots and trim away loose ends. For extra durability, reinforce the repaired area with a second row of stitching or closely spaced backstitches, especially at the seam’s beginning and end. Finally, turn the cover right side out, inspect the repair, and gently test the seam to ensure it lies flat and holds securely.

 Fancy Home